Category Archives: GLUTEN FREE

GREEK INFLUENCED LEMON, MINT, AND FETA ZUCCHINI


Summertime in New Jersey means zucchini.  Bumper crops of them.  Everyone with a home garden grows them and the stores are overflowing with locally grown boxes of this versatile squash.  Italians and Greeks love cooking with them.  The recipes are endless.    Clearly, for easy and relaxing summerentertaining this is a host’s dream.  The day before I picked a nice bunch of fresh mint (spearmint) from my garden.  Zucchini and mint are a very Mediterranean pairing, especially in Sicily and in Greece.  I had some Feta cheese and there you go…a dish is born.  Add some sunny lemons for a real Mediterranean freshness.  Are you exhausted with grilled vegetables?  I am,

call me blasphemous, but most times they are not grilled enough or burnt, and loaded down
with balsamic vinegar and too much oil.  Not a fan of the strongly acidic and flavored balsamic with charred vegetables, the flavors are too heavy for me. (I can see the hate mail now…)Instead of grilling, I decided to oven roast the zucchini slices and marinate them over night in
fresh lemon and mint with a little garlic…topping it with feta…a platter of Summer sunshine
reminiscent of a Summer’s day in the Greek Islands.. 
  It brings blue skies, bright Mediterranean sun,
white washed stucco houses clinging to the side of an ancient volcano, blue painted domes
that blend in with both the sea and the sky…magic.  All this from a bag of local zucchini.

Start with 5 zucchini.  Slice them into rounds, about 3/8 of an inch thick, any thinner, they
will just fall apart on you.  In a large stainless steel bowl, add the zucchini
along with 1/8cup of Extra Virgin Olive Oil (look for Greek Olive oil for a more “authentic”
flavor), 1 tsp. ground allspice, 1 tsp. kosher salt, 1/2 tsp. fresh ground pepper.  Toss. Pre-
heat an oven to 400 degrees F.  In a large baking pan, arrange the zucchini without overlapping.
Bake for 10 minutes, then turn them, bake for addtional 6 minutes, turn the oven off, and leave
them in for another 5 minutes.  check for times though,  You may need to adjust for your oven.
Don’t let them burn, they should have a nice roasted bottom, then when you turn them over,
they should be soft to the touch.gently place them into a bowl after they have cooled for at least 15 minutes.  Mix together the
juice of one large fresh lemon, 1 finely minced clove of  garlic, 2 leavy sprigs of fresh mint, a
pinch of salt, and a good amount of freshly ground pepper.  Pour this over the zucchini and
cover. Refrigerate for at least 3 hours, or overnight.
Arrange on a platter and crumble 1/8 cup of Feta cheese over the top.  Top with some
whole mint leaves, a little black pepper..you are done. Do not serve this cold.  Let it come
to room temperature to appreciate all the flavors on the platter…and go to your laptop and
book a trip to Greece…

TOMATO, ONION, AND BACON JAM…A HEAVENLY COMBO, AN EASY RECIPE

18765994_10209606262095759_5350010286680538053_nHere’s my recipe for a tasty “jam” that takes advantage of the sweet small cherry or grape tomatoes and smoky salty porky American Bacon.  Throw Sweet Vidalia onions in to the mix and you have my TOMATO, BACON AND ONION JAM.  A Sweet and Sour mix of heavenly flavors that really work on grilled meats like Burgers, Hot Dogs,  and even tasty over a block of cheese or sliced cheeses on a crouton or cracker.  The trick is to be patient, the bacon needs to fully cook or you have rubbery, wobbly unwanted surprises in the jam.  Nobody wants that.  Let make some JAM! My favorite application of this jam is on a cheeseburger, as pictured above.

1 lb.   CHOPPED AMERICAN BACON, some like thick cut for this, i do not. Regular cut is what I use.

2 pts. CHOPPED CHERRY OR GRAPE TOMATOES, tossed with some Kosher Salt to taste

2 TBS UNSALTED BUTTER

2 MEDIUM SIZED VIDALIA OR SWEET ONIONS, FINELY DICED

1 CUP DARK BROWN SUGAR

3 TBS APPLE CIDER VINEGAR

pinch of Allspice or Cinnamon

1 TSP KOSHER SALT

1 TSP BLACK PEPPER

1 TSP. TABASCO SAUCE

1 SPRIG ROSEMARY OR THYME

2 TBS PURE MAPLE SYRUP

Use your heaviest bottomed pot (always a good idea when cooking anything with lots of sugar, helps prevent burning).  Add the bacon over medium heat, stirring frequently to evenly cook the bacon.  After 10 minutes your bacon should be at the proper texture,  remove the bacon and add the butter.  Stir.  When the butter is melted add the onions.  Slow cook these stirring frequently for 10 minutes.  Then add the Tomatoes.  Add a pinch of salt and pepper and continue to cook until the tomatoes soften.  Should take 20 minutes.  Now add the all the other ingredients except the maple syrup and rosemary.  Bring to a boil.  Now add the syrup and rosemary/thyme, stir and simmer until it’s thickened, about 30 minutes.  Stir frequently.  Remove from heat and let it COMPLETELY COOL DOWN.  Taste for seasoning and adjust accordingly.  Store in the fridge for up to 2-3 weeks on the BOTTOM SHELF.  That’s the coldest part of your fridge.   ENJOY!!!

SPIEDIES, MARINATED AND GRILLED SKEWERED CUBES OF MEAT FROM NY STATE,ANOTHER ITALIAN AMERICAN CREATION

fullcamera 552

WHO LOVES GRILLED MEATS?  I see lots of raised hands out there so this blogpost is just for you.  Ever have a SPIEDIE??  Well it’s time you did and they are extremely easy to make at home.  They are an ItalianAmerican version of a typical skewered meat/poultry dish popular around the world, but in this fashion it’s typical of the Mediterranean version.  SPIEDO is the Italian Word for KITCHEN COOKING SPIT.  italian meats threaded on skewers in some fashion generally take the name Spiedini which has different regionalities to it depending on the location in Italy or Sicily.Maybe you’re familiar with SPIEDINI, the small rolls of filled meat/poultry threaded with onions and bay leaves, sometimes slices of Italian Bread.  Or you’ve probably had the more well known Greek SOUVLAKIA which is REAL close to ItalianAmerican Spiedies with a few less marinade ingredients and the Greeks us TZATZIKI sauce and a Pita.  Spiedies just get more of the marinade on them and can be rolled up into a slice of American White Bread or an Italian long roll.

So what makes these Mediterranean treats ItalianAmerican? Let’s go back to the old country for a moment.  In the ABRUZZO region a popular dish is cubes of marinated skwered lamb called SPIDUCC’..or SPIDDUCCI. In True ITALIAN fashion each section of the ABRUZZO has local terms for this dish.  ARROSTICINI, ‘RUSTELLE, ARRUSTELLE, all pretty much are the same thing.   The term SPIEDIE though is pure ItalianAmerican.   The cubes are marinated in a simple dressing of Olive Oil, Red Wine Vinegar (PUT DOWN THAT BALSAMIC!!! IT COMES FROM UMBRIA NOT THE ABRUZZO!! Lidia Bastianich says it best, foods from an area taste best when you use the ingredients from that area/region. Balsamic while delicious is not a substitute for all vinegar dishes, there, I’ve said it.  I know, in America it’s used on everything.  My purpose in  blogging is to give you the real deal, or close to it.  If you use balsamic, just don’t tell me LOL.), garlic or onion, peperoncino, salt, lemon juice, herbs like mint, oregano, basil, bay.  The lamb cubes would be marinated for as long as possible, threaded onto metal skewers and slow roasted over hot coals.    One of the world’s most popular ways of cooking meats yet still amazing wherever you have it.   The American connection comes in via Ellis Island during the great Italian Immigration from 1880s-1930s.  Many paesani from the Abruzzo settled in the area of Central New York State around Binghamton NY.  As is the norm they brought with them dishes from their homeland and adapted them to the new surroundings.  Lamb was first used but in the USA immigrants found ALL meats were easy to get and well priced so in true American fashion varieties of meats and poultry were used to make these Arrosticini or Spidducci which turned into the ItalianAmerican word, SPIEDIES.  Legend hotly contests who the creator of the first one in a restaurant was and who had the first “sauce” for them, but the Iacovelli family of Endicott, NY near Binghamton  in the 1920’s-1930’s gets the most credit.  Plenty of other stories about who and what but that’s where an Italian regional dish made the jump into ItalianAmerican cuisine.  These SPIEDIES were marinated in the cook’s version of SPIEDIE Sauce, and grilled, then with a piece of American White Bread (see, this is what makes things ItalianAmerican too) you roll the bread around the spiedie and pull it off into the bread.  Instant SPIEDIE SANDWICH. Italian Rolls used also.  Now let’s get your charcoal grill stoked and ready for grilling, or prep that gas grill and get this Summer on the road with a platter of SPIEDIES for your dining pleasure!!!

2 LBS MEDIUM CUBED MEAT/POULTRY..Pork, Lamb, Beef, Chicken, Turkey
1 cup Extra Virgin Olive Oil
1/4 cup LEMON JUICE, not the bottled stuff, use fresh Lemons
1 cup RED WINE VINEGAR
1 TSP PEPERONCINO
3 finely minced GARLIC cloves
2 Bay Leaves
1 TSP CRUMBLED DRIED MINT OR
2 TSPS FRESH MINCED BASIL, not both
1 TSP MINCED FRESH PARSLEY

1 1/2 TSP DRIED OREGANO

you will need to make 2 batches of the marinade.

SALT and BLACK PEPPER, to taste (be generous with it)

LONG HEAVY DUTY WOODEN SKEWERS (soaked overnight in water), or METAL SKEWERS

Double the marinade recipe and blend well.  Let this sit at room temperature for 1 hour.  Now separate in equal amounts.  Cover and reserve one batch for serving with the finished Spiedies.  Add the meat to the other batch and make sure all the cubes are in the marinade.  Add the squeezed cut lemons to the bowl and cover. Marinade in the fridge optimally overnight, or no less than 3 hours. Remove the marinating meat from the fridge and LET IT COME TO ROOM TEMPERATURE.  Thread the cubes on the skewers, depending on the length of them make sure to leave some blank space at the tip and the end of the skewers.  On a well oiled medium heat grill start cooking them lining them up without touching each other and give them at least  7 minutes per side, or more, esp with the chicken/turkey.  You can rotate them a few times to get them more evenly grilled.  Discard the first marinade and use a little of the 2d batch to baste certainly using a new bowl. Keep the rest of the marinade for serving with the finished dish.   Remove the finished Spiedies from the grill and place on a platter. Have the extra Marinade and sliced bread or rolls handy to wrap around the SPIEDIES, PULL OFF, add more marinade and ENJOY.  Makes enough for 6-8 servings.

In the Summer an Annual SPIEDIE FEST is held in Central NY…here’s the link:

40th Anniversary of Spiedie Fest


Happy Cooking!!!  Oh yes, you can buy Spiedie Sauce already made.  Or not.  Make your own.


ZUCCHINE CON PESTO…ZUCCHINI WITH BASIL PESTO

bakerco 001

Yeah I know, Summer is over, what’s this Zucchine con Pesto out of season nonsense…ahh..certainly this dish will be at it’s best in the peak of the Summer growing season..but Zucchini are in the markets all year long, possibly not as sweet as the local summer grown, but they are still delicious.  Old school types refuse to believe that there are good vegetables to be had through the winter…some better than others.  I’ve found that most Fall thru Spring Zucchini have been a breath of fresh air from the earthy flavors of the seasonal root and cruciferous vegetables.  Pesto, if you make it in the summer you can freeze it in various forms, or pack it into olive oil sealed containers, or buy a decent brand in a store, frozen or jarred.  Where did this recipe come from?  It came from necessity.  Opening the fridge one night after work and having to come up with dinner in a hurry meant slicing the zucchini in the fridge into disks.  It meant thinking, what to do that would be delicious yet quick?  Well, on the door of the fridge was a jar of CENTO PESTO, imported from Italy.  All season long i make my own pesto.  I won this jar and 7 others! in a contest on Instagram.  Yay me!!! I then thought…wow, that pesto is packed with flavor, made of good stuff..hmmm. i’ll pan saute’ the zucchini cut in rounds till they blister in olive oil…then. add some garlic to the pan, then some peperoncino…THEN when the zucchini is tender move off the flame and stir in the pesto..not much…it’s not tasty when it’s over done..Just enough to create a “sauce” and coat the cooked zucchini.  Here’s the thing…unless you’re going to add it to a soup or sauce at the end..Pesto should not be cooked.  So…off the flame the pan went and 5 minutes late i stirred a spoon of pesto into the pan. Perfection reached!!

TIME:  about 40 minutes      SERVES: 4

5 small to medium ZUCCHINI (not the big ones..too much seed, too big for this recipe)

3 tbs. OLIVE OIL

3 sliced CLOVES OF GARLIC

KOSHER SALT

1/2 TSP PEPERONCINO (the Italian word for crushed dried hot red pepper/chile)

2 TBS. PESTO


Slice the zucchini in no more than 1/4 inch thick rounds.  Heat 1 1/2 tbs. olive oil in a wide pan and add as many slices as you can without them overlapping.  You may have to do them in two or three batches.  Leave the heat on medium or you will burn the exterior of the zucchini before the inside cooks.  I’d give them at least 8 minutes on one side.  Turn one over and if it’s blistered, you’re ready to turn them. Lightly salt them each time you add raw zucchini to the pan.  Let the other side blister as well, blistering meaning taking on nice color without burning.  Remove to a platter or dish and keep covered with foil as you finish the next batches.  Add more Olive Oil as necessary. Taste a zucchini, make sure it’s tender and seasoned. When you are done with the zucchini, in the pan you just cooked the zucchini in, add the garlic and peperoncino and let this  get fragrant, only takes about 1 minute to 1 1/2 minutes..do not let the garlic burn. Remove from the heat.   Now add the pesto and blend well with the oil being careful not to splatter yourself or all over the stove.  Now gently add the zucchini back into the pan and coat all the rounds with the “sauce”. This is one of my examples of LA DOLCE FAR NIENTE, real Italian style…the sweet joy and bliss of doing nothing..meaning..lazily hanging around enjoying good company and good food.  A plate of this zucchini does not have to be PIPING HOT..it can stay out at room temperature and infact, I think it taste better at room temperature.  Have  a table set with lots of these types of dishes and you can enjoy your guests and family instead of running back and forth into the kitchen.  A family style platter of this on the table or side board is perfect. It can be part of an antipasto or a “contorno” or side dish for a full meal.  However you serve it do not fuss..bring that LA DOLCE FAR NIENTE into your home.  Cooking is only a job if you get paid for it.  When you are home..enjoy!

OLYMPUS DIGITAL CAMERA


Imagine yourself along a canal off of the Venetian Lagoon…like this wonderful one in Burano outside of Venice…imagine a long table. lots of seafood and meats, vegetables, pasta and fruits…breads, antipasti..grilled…and  THAT is what I think of with a platter of this zucchini.  Did you notice I spelled it ZUCCHINE in the title?  That’s my inner Italian coming out…in Italian the word is ZUCCHINE (plural for ZUCCHINA, which means small squash, which is a ZUCCA, and they come in all shapes and sizes and colors.  In English we use the word ZUCCHINI) I’ve given you a vegetable dish AND a small Italian Grammar lesson.  Most importantly I’m giving you the permission to enjoy LA DOLCE FAR NIENTE..now go find it for yourself !! Happy Cooking!!

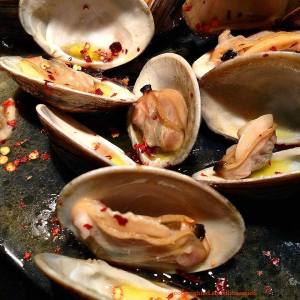
VONGOLE ARRABBIATA, CHILE SPICED CLAMS

002

This is a great idea for hanging around on the weekends watching games, or casual get togethers, even works for a weeknight  meal.  America LOVES Chiles, after all it’s one of our indigenous plants.  We go crazy for hot sauce, for whole chiles, for all foods made with them in their fresh, cooked, or dried states.  America is a CHILE CRAZED nation.  From the Americas the rest of the world learned how delicious they are…with a seemingly addictive nature they have regardless of where in the world they are being consumed.   Let’s explore Italy (shocker) for a moment, in particular Southern Italy.  Chiles are a mainstay in all hot climates and the southern regions of Italy are hotbeds (pun intended) for growing these peppers.  Depending on the region they are referred to as PEPERONCINO or DIAVOLiCCHIO .DIAVULLILU, and many others.  Just an aside, don’t confuse PEPERONCINO with the Italian-American pickled Vinegar pepper known as PEPPERONCINI as they are 2 very different foods including their spelling.

Basilicata where my paternal Grandpa comes from LOVES the chile pepper in it’s cuisine.  Shows up in so many of the regional dishes.  We grew up with that tradition which was further cemented by my Dad who grew tons of redhot chiles and dried them every year strung up all over the basement rafters. Dad’s been gone since 2003 but I have the last jar he gave me. It’s my most prized “food” possesion. A pinch of peperoncino is a usual cooking method in COUNTLESS Southern ITalian dishes but sometimes it becomes the dominant flavor as in ARRABBIATA style, or FRA DIAVOLO(more ITalian-American) meaning ANGRY.  A colorful way to describe a dish..it’s a popular tomato sauce for pasta.  Here I take that southern Italian seafood and chile tradition and elaborate on it.  I rarely say this, but certainly adjust the amount of peperoncino that you are using to your taste but if anything spicy is not in your wheelhouse this isn’t the recipe for you.  My suggestion for how to serve this is as you would serve a pot of steamers…just the clams…and some good bread.

TIME: 1/2 HOUR                               SERVES:  4

4 TBS OLIVE OIL

4 CLOVES OF GARLIC, SLICED

1 1/2 TSP. PEPERONCINO

4 DOZ LITTLE NECK CLAMS, or COCKLES, or MANILA CLAMS, well scrubbed and rinsed

1/4 CUP WHITE WINE

JUICE OF ONE LEMON

SEA SALT

In a heavy bottomed pot heat the olive oil, then add the garlic and the 1 tsp. of the Peperoncino. Let this cook on medium for 2 minutes being careful not to let the garlic brown, then add the wine.  Bring to a boil then to a simmer. Add the clams.  With a heavy spoon get all the clams coated with the wine and garlic liquid.  THEN, cover tightly and keep on simmer and STEAM the clams until they have opened, takes about  8  minutes.   Shake the pot midway thru GENTLY.  Carefully remove the cover  and give the clams a good but gentle stir.  Remove any that did not open.  Add the lemon juice and the balance of the peperoncino and gently stir again. SERVE! with some good bread.  That’s it!! Now,are you wondering why I have salt in the ingredient list?  Taste that liquid.  I will venture a guess that it’s totatlly seasoned.  Why?  The liquor from the clams is salt water.  That will season the juices. Adding salt will put it over the top, unless you feel you need to, SO,before you serve, taste..then season if you need to, and drizzle with good Olive oil, then serve.  COOKING RULE…you can always add, you can NEVER subtract salt from a dish. There’s also a lack of greenery here..it’s no needed. Those clams look beautful without the green addition.  If you feel you need it…a little chopped flatleaf Italian parsley I guess (can you see my displeasure?? lol)..but one should always eat to one’s taste and pleasure.


PIGNOLI COOKIES, A GIFT FROM SICILY

pignoli 013

Memories taste sweet and one of the sweetest memories I have is of my Mom’s PIGNOLI COOKIES.  Hers were not unique but they were hers and that’s what makes them special. I treasure her recipe box which was really not how she cooked, only certain things were committed to a written recipe.  Her cooking was mostly recipes in her head…I wonder where I get that from.  This was one of her written ones..the PIGNOLI COOKIE which is the GRAND PRIZE if you landed the one or two that are in all ItalianAmerican cookie platters at the end of a special occasion.  Almond paste and Pignoli, the two main ingredients have always been wildly expensive.  Most bakeries today sell them for 29.99-35.00 @ lb. Making them at home is much cheaper, but not cheap.  Here’s Mom’s recipe card:aipignul As with all her written recipes, they are incomplete.  Her philosophy was , if you know how to cook, you can fill in the blanks.  So there you go.  I wanted to make them and went by memory.  Too lazy to look for Mom’s card.  I remembered it right down to the measurements…pretty scary.  I did add 2 other items away from Mom’s recipe, one was 3 tbs. of sifted Unbleached flour and 1/2 tsp. of Pure Vanilla (have we had this talk yet..go to your pantry..if your extract says Imitation, throw it out…buy a bottle of PURE Vanilla. Why are you cooking with fake stuff?  Unless you are baking everyday in big quantities the additional cost of the real item is not a burden.) The flour just helps stabilize the mixture, the vanilla I use in baking like one uses lemon in savory cooking.  It seems to carry the other flavors and enhance them.  That almond essence is just fantastic in these chewy almond macaroons (yeah, they are a form of macaroon).

So what’s the history of this cookie?  Marzipan is a very well loved and used ingredient in European confections, North, Central and Southern.  In Italy the region that Marzipan or PASTA REALE really is King is Sicily.  Certainly the Salento and Puglia have their share of Almond Paste treats, but in Sicily it’s almost a religion.  Almonds are a crop for the region and Sicilians include almonds in both their sweet and savory foods.  No one knows for sure where this pignoli (which is another hallmark of Sicilian cooking) topped almond macaroon came from.  The cookie is also made with slivered almonds on top.  Since all research I’ve read points to Sicily, I’m going with that premise.

Notice 2 things in my pictures that I don’t want you to do.  First is the foil on the baking sheet.  I had no Silpat, no parchment paper.  I improvised with lightly greasing a foil lining. In a pinch it works, but you SHOULD use silpat or Parchment.  The texture will be better.  They are also just a touch darker than they should be.  I received a work related call while I was baking them and that extra 2 minutes in the oven created a crispy sort of bottom.  They should be soft yet browned so, shut your phone off when you are cooking or risk a potential disaster.  Had I not pulled them out when I did they would have become AMARETTI, those toasted almond macaroons, delicious, but not what I was making. Seconds count in cooking and baking!!!

TIME: 45 MINUTES                                         YIELD:  18 COOKIES

8 oz. ALMOND PASTE, cut into small pieces then broken up with a mixer into small pieces

2/3 CUP SUGAR

3 TBS. SIFTED UNBLEACHED FLOUR  (omit this is you are looking for GLUTEN FREE)

2 BEATEN EGG WHITES at ROOM TEMPERATURE

1/2 TSP. PURE VANILLA EXTRACT

1 CUP PIGNOLI (PINE NUTS)

CONFECTIONER’S SUGAR FOR DUSTING (Check the labels as not all Confectioner’s Sugar is Gluten Free if you are in need of this to be GF, if not, omit)

SILPAT or PARCHMENT PAPER  (Mom used Waxed Paper, but I think Parchment is a better choice)

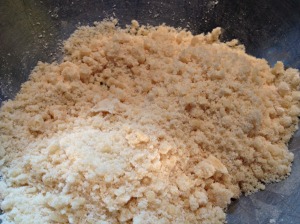
Let’s start baking.  Pre heat oven to 325 F.  To the already mixed up Almond paste (you can use a food processor too) add the sugar.  Mix well, Then add the flour.  Mix well. Should look like this:pignoli 001 Now add the eggs and vanilla and mix just until the mixture comes together. It will be a sticky dough so don’t be alarmed at that.  It should hold a small ball shape.  Empty the nuts into a bowl.  Now, roll 18 equal sized small balls, i guess a teaspoon full is good.  Eyeball this folks, just keep them equal size. That’s also how things bake properly and at the same time.  Dip one side of the ball into the bowl of Pignoli.  Then place them on the Silpat or Parchment Paper lined baking sheet.  Use heavy baking sheets if you can.  Less chance of burning will occur. When they are all lined up, with room in between place them into the oven on the middle rack.pignoli 002 looking at the foil is killing me.  But, honesty in cooking and blogging so there you go.. DON’T USE FOIL!! Bake them for 15 minutes.  Then place them in the top rack and bake for addition 5 minutes only.  USE YOUR HEADS HERE!! If they look too brown or brown enough don’t do the 5 extra minutes.  Every oven is calibrated differently…so use the common sense adjustment for making these.  Your eyes are your biggest cooking implement.   When you remove them let them sit for 3-4 minutes, then gently transfer them with a spatula to a cooling rack.  Let them cook for 1/2 hour.  pignoli 004  My phone call created those over toasted pignoli on the cookies and the darker ring around the base.  No phone calls.. Let it ring. That’s what voicemail is for.  Now dust them with Confectioner’s Sugar.  pignoli 005  If not serving them right away no sugar dusting until you are serving.  MAKE SURE THEY ARE STORED IN AIR TIGHT CONTAINERS!!!  You will get that wonderful soft and chewy texture then.pignoli 022 Like that!!  Even with my extended accidental baking time they were wonderfully PIGNOLI COOKIE textured.  I can hear my Mom exclaim ” AI’PIGNUL”  spoken as Ai PEENYOOL…dialect Italian…  That makes this blog and recipe much more personal for me, and so, for you too.  You are baking an HEIRLOOM recipe, as much as that overused buzzword can be thrown around, it makes perfect sense here.  With anticipation I would watch my Mom remove the Marzipan (Almond Paste) from the plastic covered tubes (Odense was the brand she used) and steal a chunk or two of it before she continued with the rest of the recipe.  Food memories make for better tasting food.  GRAZIE MOM for this gift, her recipe is like a million others but I have the proof in my hands and her handwriting.  And now I pass it on to you.  Happy Baking!  Happy Eating!!


pignoli 012

PINEAPPLE TEQUILA MARINATED GRILLED CHICKEN…

542515_3251677893198_1909468499_n Can you smell that?  Stick you nose closer to the screen, now can you??  If you can’t then you just have to make this yourself.  Let me just put this out there…this is infinitely better made with trimmed boneless chicken thigh cutlets.  However it will work with breast too, your cooking times will be adjusted.  Taste will determine what you eventually will cook but the thighs always work better with the direct heat that a grill provides.  Why?  It’s the make up of the meat itself..more fat in the dark meat which keeps the meat from drying out.  Breasts are wonderfully almost fat free but the downside is over cooking since there’s no self basting provided by nature.  The pictures are of thigh cutlets but feel free to use the breast cutlets.

One of the best flavor profiles with direct grilled heat is the chile, fruity, sweet, sour, spicy type which is wonderfully achieved with a mix of cumin, pineapples, cilantro or mint, tequila, lime, garlic, and chiles.   Your mouth should be watering at this point.  Layer the smoke and char of the flames on the grill and you are in grilled meat heaven.  This marinade sort of has a southwest US meets the Pacific coast of Mexico sort of vibe.  a cilantro or other fresh herbed rice is a very nice base to serve it over.  OK, let’s talk about pairings like this for a moment shall we? The chicken is the star, don’t have it become Jan Brady and become a middle child fighting for attention! All too often when a strong flavored protein is served with a side, or on a side, the side is way too highly flavored and instead of the chicken being complimented by the rice they are fighting for your attention and the combo of all strong flavor diminished the whole point of the dish…in this case the chicken.  A plain steamed long grain rice (short grain, too creamy, you want the rice to be fluffy and separate) that you finish with  a little minced cilantro or mint is all you need.  Let’s walk into the kitchen now.

TIME: 2 1/2 hours or more depending on your marinating time         SERVES: 4

MARINADE:

1 can CRUSHED PINEAPPLE , important  IN IT’S OWN JUICE,not in SYRUP  (the syrup contains too much sugar and will char quickly

1/8 cup OLIVE OIL or Grapeseed Oil or Vegetable Oil

1 sliced JALAPENO, cored and seeded

2 GARLIC CLOVES turned into a paste or pushed thru a Garlic Press

1 TSP KOSHER SALT

3 BRUISED SPRIGS OF CILANTRO OR MINT

1 TSP GROUND CUMIN

1 TBS. FRESH LIME JUICE

1/8 CUP TEQUILA

CHICKEN:

12 TRIMMED AND POUNDED to no less than 1/4 inch (ORGANIC IF POSSIBLE)  BONELESS CHICKEN THIGHS OR BREAST

KOSHER SALT, BLACK PEPPER

AGAVE NECTAR

CHILE POWDER

Prep your chicken and lightly season it with salt and pepper and cover it, place in a cool spot in your kitchen.  If it’s hot out and your kitchen is hot, place the prepped chicken into the fridge.  Safety first my cooking sisters and brothers.  Whisk all the other ingredients except the Cilantro together and leave alone for 1/2 hour. Now strain the marinade and reserve the pieces of crushed pineapple..place to the side in a bowl. Cover.  Add the chicken to the marinade and marinade for AT LEAST 1 hour, certainly the longer…the better the flavor .that’s up to you.  Prep your grill blasting it with the cover on for at least 15 minutes.  Open the cover and lightly oil those grated..make sure you cleaned them up after your last use.  C’mon…use that grill brush!! Grills with bits of meals past not only are gross, but that interferes with your cooking evenly and  you miss out on those REALLY COOL grill marks that I KNOW excite you.  Especially if you’re a food picture taking geek like me. When your grill is ready, smooth side down place all the chicken on the grill careful not to overlap any of the pieces.  (Steaming happens and not what you are looking for in this recipe).

While the chicken is cooking…in a small lightly greased pan, saute’ the the reserved pineapple for about 6 minutes..keep shaking the pan to get some color on the crushed pineapples. Reserve.

Grill for 4 minutes per side for breast meat, grill 8 minutes on one side and 5 on the other for thigh meat.  Now to complicate this dish, but it’s a good thing.  About 2 minutes before you are done grilling, top each piece of chicken with some of the sauteed pineapple.  Cover till done.

All GRILLS COOK DIFFERENTLY..make sure your chicken runs clear juices and it thoughroughly cooked before serving.  Better to be safe than sorry so use my cooking times as guides but you ARE THE COOK so make sure you are not serving either undercooked or overcooked chicken.

Transfer all  to a platter.  Mix about 1/8 cup of Agave Nectar with 1/8 teaspoon (or more , to your taste) ground Chile Powder together and drizzle over the finished chicken.  Let rest for 5 minutes…then serve…over the steamed rice (ooooohhh Jasmine or Basmati , those fragrant ones are best for this).

Happy Grilling, Happy Cooking!!!

383468_3036299628876_1304531591_32215781_825528770_n


TURKISH SHEPHERD’S SALAD, OR ÇOBAN SALATASI

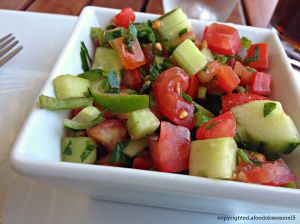
fulleuropevaca 1432  We are now in the throes of Summer.  The fresh seasonal and local produce is all around us.  My favorite time of the year!  AND it’s also when my family takes it’s annual vacation.  This year we did an “AmazingRace” like whirlwind from Belgium to Amsterdam to Germany to the Czech Republic to Poland to Slovakia to Hungary to Austria….take a breath,…then we finished the trip flying from Salzburg Austria to Istanbul Turkey.  Wonderful time, no problems, no issues, phenomenal scenery and people, many time zones, currencies and of course…THE FOOD!!!  What’s a food blogger to write about first?  Really!! I have 3000 pictures of sights and foods to remember the great trip by and the food choices along the way were varied and fantastic. Again, where do I start to share my food finds?  Last night I was at a Farmers Market here at the Jersey Shore and it came to me that my first “What did I eat on my Summer Vacation” post came to me.  Fresh vegetables.  They were at their peak wherever we went and they are at their peak here at home.  I’m going to ease my way back into blogging, I did give myself a 3 week break, so I’m happily back to work at it now.  My choice was a simple salad that was made extraordinary by the local seasonal vegetables used by the cooks.  It’s a chopped vegetable salad that is a common salad in Turkey.  First, this is my lingering view of Turkey:

OLYMPUS DIGITAL CAMERA

Sit back from your screen and drink that view in.  It’s of the Blue Mosque in Istanbul taken from the Karakoy Ferry we were on.  It took us from the European side to the Asian side of Istanbul, the only city that straddles itself on two continents. Like that?  Good.  I’m glad.  Now we move into the kitchen to prepare what the Turkish call ” COBAN SALATASI”, a common version of a Mediterranean chopped vegetable salad.  As with most heritage and regional recipes there are variations with Feta or no Feta cheese.  The version we had, see the lead picture, contained no Feta.  The taste was crisp, clean, and refreshing.  Maybe the amount of parsley in it contributes to that too. So, I’m giving you, the cook, the option to either include the Feta or not.  Next time I make it, I’ll add some feta.

COBAN SALATASI—–TURKISH SHEPHERD’S SALAD

SERVES: 4-5                                  TIME:45 MINUTES

2 RIPE LARGE TOMATOES, DICED

2 MEDIUM SIZED CUBANELLE (ITALIAN FRYING PEPPERS), SLICED AND DICED

1 MEDIUM CUCUMBER,  DICED

1 SMALL SWEET ONION, DICED FINE

1/2 BUNCH ITALIAN FLAT LEAF PARSLEY COARSELY MINCED

1/4 CUP CUBED FETA

SEA SALT/KOSHER SALT

EXTRA VIRGIN OLIVE OIL

JUICE OF ONE WHOLE LEMON

Whisk 1/8 cup Olive oil with the lemon, season with salt and pepper.  Let this sit for about 1 hour. Then whisk again.  Mix all the vegetables together.  Then pour the seasoned Olive Oil and Lemon over the whole thing and mix.  Let this sit for 1/2 at room temperature.

that’s it…fulleuropevaca 1490 It’s simple, clean, and goes GREAT with the usual American table of grilled or BBQ meats and seafood we enjoy through the summer.  It also makes a wonderful entree for a summer meal.  Grilled smoky pita bread, olives, cheeses..see where I’m going with this? Well, nice to be back home with lots of memories to keep my fingers typing and kitchen cranking and hopefully some new things for you to make in your kitchens!!

Before we leave this Turkish delight….enjoy this pic of the interior of AYASOFYA, or HAGIA SOPHIA.  For any fan of  World Art and Architecture this is one of the sights one wants to see.  I’ve wanted to see this since I was a kid first seeing it in a National Geographic Magazine. fulleuropevaca 1437


SHRIMP SCAMPI, MY VERSION OF THIS ITALIAN AMERICAN CLASSIC

scampi 022 I hope that picture caught your attention.  I made this dish and looking at it  I’m thinking, boy, would I like to make that dish!!   It’s the colors, it’s the SHRIMP, it’s the total package.  The dish known as SHRIMP SCAMPI is almost a universal favorite because it contains so many flavors that we love.  Well here comes my lecture, you’re not going to get my recipe without me pontificating about the dish.  Sit down, get a nice glass of wine, espresso, coffee, tea, for other drink and let’s talk SCAMPI.  First lesson of the post is that what you are looking at and probably call “Scampi” is an Italian-American creation that is correctly called SHRIMP SCAMPI, hence the title of the blog.  Why is it not just SCAMPI?? GLAD YOU ASKED! This is a SCAMPI:scampi 004 Aren’t they gorgeous?  That’s a crustacean called NEPHROPS NORVEGICUS. Say that three times.  Translated it’s the NORWEGIAN LOBSTER, or most commonly called LANGOUSTINE.  It also goes by the lively name DUBLIN BAY PRAWN and possibly a host of others. It’s a slender creature win long pincers that unfortunately does not inhabit the waters of the United States.  Very unfortunate.  This is my favorite food..on earth.  How sad for me.  Let’s move on.  In Italy this crustacean is called LO SCAMPO or GLI SCAMPI.  You’re practically fluent now!  The North Atlantic and the Mediterranean are Scampi grounds.  In Italy the most common way to prepare  SCAMPI is split, then grilled with Olive Oil, parsley, and lemon.  Simple!! Did I tell you I recently found some Scamp here in the U.S. and cooked up 6 of them? Here’s the proof:scampi 016And that’s what they look like.  The bodies resemble a large Shrimp (oxymoron aside) and the immigrants to the U.S. from Italy recreated this dish and transformed it, using the available shrimp here into a dish that now took on some of those Italian traits all pressed together to create the Olive Oil, Shrimp, Lemon, Wine or Vermouth, Parsley and Garlic dish we call SHRIMP SCAMPI!  Ok, class is over, there will be a quiz tomorrow before you’ve had your first latte.  I hope that was interesting but what’s even more interesting will be cooking and eating Shrimp Scampi so let’s get cooking!!

PREP AND COOKING TIME: 1/2 hour              SERVES: 4

1 1/2 LB JUMBO SHRIMP, PEELED AND DEVIENED (stop right here..did you throw those shrimp shells out?  really?  Do you like the taste of a rich shrimp bisque?  That flavor comes not from the meat of the shrimp, but from a stock that is a reduction of the shells.  The flavor in the shells is just amazing.  You can either make your stock while you are cooking the shrimp, or freeze them in a tightly closed bag for about 1 month. Then use them when you get a nice amount and make a stock similar to how you would make a chicken stock.  Don’t waste anything!!  All those flavors that a good chef/cook will wow you with are derived many times from what’s considered garbage)

1/4 cup OLIVE OIL

2 TBS. UNSALTED BUTTER

4 SLICED CLOVES OF GARLIC

1/8 CUP WHITE WINE OR VERMOUTH

KOSHER SALT

PINCH OF FRESH GROUND BLACK PEPPER

2 TBS. FINELY MINCED ITALIAN FLAT LEAF PARSLEY

JUICE OF ONE LEMONscampi 019

In a wide skillet heat 1/2 the oil and 1/2 the garlic, pinch of salt. Saute’ for only under a minute, then add the shrimp.  Saute’ for a few minutes on each side then remove them and the pan contents to a platter and lightly cover with foil.  Now add the rest of the oil, the garlic, when you smell that garlic…add the wine and bring to a boil then to a simmer.  Let this cook for 2 minutes, then add the shrimp back in and coat well with the pan juices.  Cook for 3 minutes.  Remove from heat.  Add the parsley, the lemon juice, pinch of salt, black pepper and the butter.  scampi 021 Now be a good cook and taste one of the shrimp…(how will you know if it tastes right??)..if they are done, they are ready to serve.. If you need more seasoning..go with more lemon juice before you add salt, or just a pinch.  Now serve on their own, with rice, with pasta.  This is a clean crisp presentation.  Some recipes call for the kitchen sink to be added as well (in the 60’s they added Worchestershire Sauce..i’m pretty sure that those Italian scampi weren’t swimming in Worchestershire Sauce…so…no thanks to that in my Scampi Style Shrimp!!).

The butter is a finisher…a closer if you will..it adds a little flavor, but it pulls the dish together as opposed to cooking this in a butter “sauce”..where butter is the main fat in the sauce.  and the Lemon and parsley are last too because they add tons of flavor to it, fresh flavor.  If you add those ingredients early on..they sort of get lost in the end product.scampi 018  US WILD CAUGHT SHRIMP..a  product we can be proud of and really the best type to use for your cooking and eating.  Hopefully you can find some near you to create this dish!!


ROASTED GREEN BEANS…AN EASY FRESH VEGETABLE

162885_1500720160349_5853202_n

FRESH, BRIGHT, GREEN. All words I long to hear when April rolls around.  Living in the Northeast United States this year has held onto a really unseasonably cold Winter for way too long.  Even under normal regional weather conditions for this time of the year I’m as overdone as burnt toast pleading for something green to sprout from the ground.  Whether you celebrate Spring, Passover, Easter foods which have bright fresh flavors take center stage.  The root vegetables will finally take a back seat and it’s back to seeing new vegetables in the markets.    So to start off the Spring season and possibly  Holiday cooking let’s make some Roasted Green Beans. Stop, don’t think that this is a “Spring” thing, you can get fresh green beans throughout the year so keep that in mind.  When  in season in your area and  grown local…even BETTER.  The ingredients are few, the flavor is immense.  Green Beans, OliveOil, Garlic, Salt , Pepper.  Are you with me??  Awesome. step into my kitchen and let’s cook!!

SERVES: 5-6                            TIME:  25 MINUTES

1 1/2 lbs. TRIMMED CLEANED FRESH GREEN BEANS

2 1/2 TBS.  EXTRA VIRGIN OLIVE OIL

1-2 SLICEDor HALVED CLOVES OF GARLIC

KOSHER SALT

GROUND BLACK PEPPER

ONE LARGE LEMON

Pre heat oven to 450 degrees F.  Using a sturdy baking pan, lay out the green beans and coat with 2 tbs. of Olive Oil. Make sure you have them in one flat layer.  Sprinkle with about 1/2 tsp of saltand the garlic.401674_3107550370100_1304531591_32244544_484452443_n  Now roast them in the oven for 10 minutes.  Remove and give them a toss, continue to roast for 5 more minutes as they gently brown. Remove and season with salt and pepper. Drizzle with 1/2 Tbs. of the Olive Oil. Slice the lemon and squeeze 1/2 of it over the beans. Ovens like people are very tempermental and unique so as with any recipe YOU are the most important part of the recipe.  450 F in your oven may cook them faster or slower..just keep an eye on them.  You want them to be somewhat wrinkled, tender yet not mushy. Serve with lemon slices.

Good to see green on my pages and in the stores and very soon outside!  Happy Spring!!

423047_2817814366881_1304531591_32126981_153248436_n